From Bitbucket to Boom! Setting Up Continuous Deployment to Kubernetes
So, you’ve built a fantastic application, you’re using Bitbucket for your code, and you’re ready to unleash it on the world (or at least a staging environment) using Kubernetes. But manually deploying your code every time you make a change? That’s a recipe for late nights and potential errors.
Enter Continuous Deployment (CD). Imagine code changes automatically being deployed to your Kubernetes cluster whenever you push to your repository. Sounds good, right? This blog post will walk you through setting up CD from Bitbucket to Kubernetes, making the process clear and easy, even if you’re just getting started.
What We’ll Cover:
- Why Continuous Deployment is a Game Changer
- Prerequisites: What You Need Before We Start
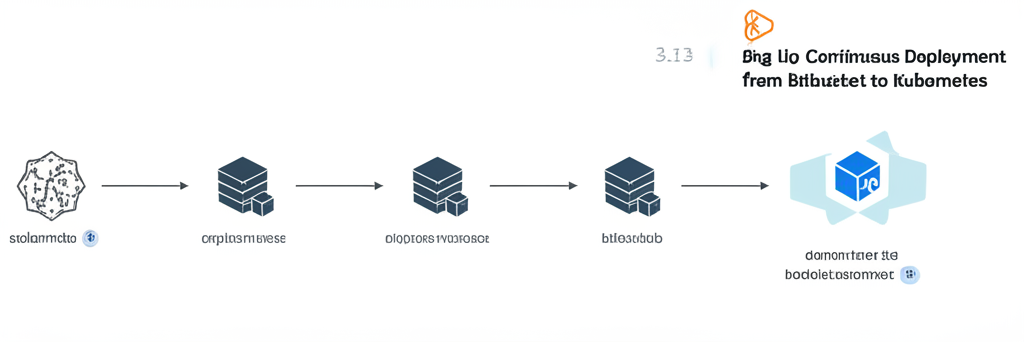
- Step-by-Step: Setting Up the Pipeline
- Creating a Kubernetes Cluster (Optional: Using Minikube for Testing)
- Setting up a Bitbucket Repository (If you don’t have one already)
- Creating a Dockerfile
- Pushing Your Image to a Container Registry (Docker Hub, AWS ECR, etc.)
- Defining your Kubernetes Deployment and Service
- Creating a Bitbucket Pipeline Configuration (bitbucket-pipelines.yml)
- Configuring Kubernetes Credentials in Bitbucket
- Testing and Troubleshooting
- Next Steps: Leveling Up Your CD Game
Why Continuous Deployment is a Game Changer:
Think of CD as your reliable, tireless deployment robot. It automatically:
- Reduces Errors: Automated processes minimize human error.
- Speeds Up Delivery: Get new features and bug fixes to users faster.
- Increases Efficiency: Developers can focus on coding, not deploying.
- Improves Collaboration: A clear, automated process benefits the whole team.
Prerequisites: What You Need Before We Start:
- A Bitbucket Account: If you don’t have one, sign up for free!
- A Kubernetes Cluster: This can be a cloud-based cluster (like GKE, AKS, EKS) or a local one (like Minikube or Docker Desktop). We’ll mention Minikube for testing.
- Docker Installed: You’ll need Docker to build and push your application image.
- A Container Registry Account: (Docker Hub, AWS ECR, Google Container Registry, etc.) This is where you’ll store your Docker image. Docker Hub is a great place to start and is free for public repositories.
- kubectl Installed: The Kubernetes command-line tool for interacting with your cluster.
- Basic Kubernetes Knowledge: Understanding of deployments, services, and namespaces is helpful.
Step-by-Step: Setting Up the Pipeline:
Let’s get our hands dirty!
1. Creating a Kubernetes Cluster (Optional: Using Minikube for Testing)
- For Cloud Clusters (GKE, AKS, EKS): Follow the provider’s instructions to create a cluster.
- For Minikube: If you want to test locally, Minikube is your friend. Install it from https://minikube.sigs.k8s.io/docs/start/ and run
minikube start.
2. Setting up a Bitbucket Repository (If you don’t have one already)
Create a new repository in your Bitbucket account and initialize it with a README.
3. Creating a Dockerfile
This file contains instructions for building your application’s Docker image. Here’s a simple example for a Node.js application:
FROM node:16-alpine

WORKDIR /app

COPY package*.json ./

RUN npm install

COPY . .

EXPOSE 3000

CMD ["npm", "start"]
- FROM: Specifies the base image (Node.js version 16 using Alpine Linux).
- WORKDIR: Sets the working directory inside the container.
- COPY: Copies files from your local machine to the container.
- RUN: Executes commands inside the container (installing dependencies).
- EXPOSE: Exposes port 3000 (the port your application listens on).
- CMD: Defines the command to run when the container starts.
Place this Dockerfile in the root of your Bitbucket repository.
4. Pushing Your Image to a Container Registry
Before Kubernetes can deploy your application, you need to push your Docker image to a container registry.
- Docker Hub: Login to Docker Hub using
docker login. - Build your image:
docker build -t your-dockerhub-username/your-app-name:latest .(Replace placeholders with your actual username and app name). - Push your image:
docker push your-dockerhub-username/your-app-name:latest
5. Defining your Kubernetes Deployment and Service
These files tell Kubernetes how to deploy and expose your application. Create two files: deployment.yaml and service.yaml.
deployment.yaml:
apiVersion: apps/v1
kind: Deployment
metadata:
  name: your-app-deployment
spec:
  replicas: 2  # Run two instances of your application
  selector:
    matchLabels:
      app: your-app
  template:
    metadata:
      labels:
        app: your-app
    spec:
      containers:
      - name: your-app-container
        image: your-dockerhub-username/your-app-name:latest  # Use your image!
        ports:
        - containerPort: 3000
service.yaml:
apiVersion: v1
kind: Service
metadata:
  name: your-app-service
spec:
  type: LoadBalancer  # Expose the service externally (for cloud clusters)
  selector:
    app: your-app
  ports:
  - port: 80
    targetPort: 3000
- deployment.yaml: Defines how your application will be deployed and managed within the cluster.
replicas: 2ensures two instances are always running. Make sure theimagefield matches your Docker Hub image. - service.yaml: Exposes your application to the outside world.
type: LoadBalancer(for cloud) will provision a load balancer (this might incur costs). For Minikube, you might need to change this totype: NodePortand then useminikube service your-app-serviceto get the URL.
6. Creating a Bitbucket Pipeline Configuration (bitbucket-pipelines.yml)
This is the heart of your CD pipeline! Create a file named bitbucket-pipelines.yml in the root of your repository.
image: atlassian/default-image:latest

pipelines:
  default:
    - step:
        name: Build and Deploy
        script:
          - echo "Building and pushing Docker image..."
          - docker build -t your-dockerhub-username/your-app-name:latest .
          - docker login -u "$DOCKERHUB_USERNAME" -p "$DOCKERHUB_PASSWORD"
          - docker push your-dockerhub-username/your-app-name:latest
          - echo "Deploying to Kubernetes..."
          - pipe: atlassian/kubectl-deploy:1.6.0
            variables:
              KUBE_CONFIG: $KUBE_CONFIG
              NAMESPACE: default  # Or your desired namespace
              DEPLOYMENT_FILE: deployment.yaml
              SERVICE_FILE: service.yaml
- image: Specifies the Docker image to use for the pipeline.
- pipelines: default: Defines the default pipeline that will run on every push.
- step: A single task in the pipeline. This step builds the Docker image, pushes it to Docker Hub, and deploys it to Kubernetes.
- docker login: Logs into Docker Hub using environment variables. We’ll configure these in Bitbucket settings.
- pipe: atlassian/kubectl-deploy: Uses a pre-built Bitbucket pipe to handle the Kubernetes deployment. Pipes are reusable components that simplify pipeline configuration.
- variables: Configures the
kubectl-deploypipe, specifying the Kubernetes configuration, namespace, deployment file, and service file.
7. Configuring Kubernetes Credentials in Bitbucket
Bitbucket needs access to your Kubernetes cluster. You’ll do this by configuring environment variables and a secure file in Bitbucket settings.
- Get your Kubernetes Configuration (kubeconfig): This file contains the credentials for connecting to your cluster. The location of this file varies depending on your setup (usually
~/.kube/config). - Add
KUBE_CONFIGas a secured environment variable: In your Bitbucket repository settings, go to “Settings” -> “Pipelines” -> “Repository variables”.- Add a variable named
KUBE_CONFIGand paste the contents of yourkubeconfigfile into the “Value” field. Crucially, mark this variable as “Secured”. This prevents the value from being displayed in the pipeline logs.
- Add a variable named
- Add
DOCKERHUB_USERNAMEandDOCKERHUB_PASSWORDas secured environment variables: Similar toKUBE_CONFIG, add these variables with your Docker Hub username and password, marking them as secured.
Commit and push all your files (Dockerfile, deployment.yaml, service.yaml, bitbucket-pipelines.yml) to your Bitbucket repository.
Testing and Troubleshooting:
- Watch the Pipeline: Go to your Bitbucket repository, click on “Pipelines”, and watch the pipeline run. If it fails, examine the logs for errors.
- Common Issues:
- Incorrect Docker Hub credentials: Double-check your
DOCKERHUB_USERNAMEandDOCKERHUB_PASSWORDvariables. - Kubernetes Connection Issues: Verify your
KUBE_CONFIGvariable is correct and that your Bitbucket pipeline can access your Kubernetes cluster. Firewall rules might need to be adjusted. - Image Pull Errors: Make sure your Docker image name in
deployment.yamlmatches the image you pushed to Docker Hub. Also, check that your Kubernetes cluster has permission to pull the image (especially if you’re using a private registry).
- Incorrect Docker Hub credentials: Double-check your
- kubectl: Use
kubectl get pods,kubectl get deployments,kubectl get servicesto check the status of your application in Kubernetes.
Next Steps: Leveling Up Your CD Game:
- Automated Testing: Integrate automated tests into your pipeline to ensure code quality before deployment.
- Environment-Specific Configurations: Use different configurations for development, staging, and production environments.
- Secrets Management: Explore secure ways to manage sensitive information like API keys and database passwords using Kubernetes secrets or external secret management tools.
- Rollbacks: Implement automated rollback strategies in case of deployment failures.
- Infrastructure as Code (IaC): Manage your Kubernetes infrastructure using tools like Terraform or Helm.
Conclusion:
Setting up Continuous Deployment from Bitbucket to Kubernetes might seem daunting at first, but breaking it down into steps makes the process manageable. By automating your deployments, you’ll streamline your workflow, improve your application’s reliability, and free up valuable time for development. So, go ahead and give it a try! Happy deploying!