Level Up Your GitLab CI/CD: Templates, Includes, and Multi-Stage Pipelines
GitLab CI/CD is a powerful tool for automating your software development process. But let’s be honest, complex .gitlab-ci.yml files can quickly become a maintenance nightmare. That’s where GitLab’s features like templates, includes, and multi-stage pipelines come to the rescue!
This post will break down these features, making them easy to understand and implement, so you can streamline your CI/CD process and keep your pipelines organized. Whether you’re a beginner or have some experience, we’ll cover the basics and show you how these features can dramatically improve your workflow.
What are we covering?
- Templates: Reusable configurations for common tasks.
- Includes: Modularizing your
.gitlab-ci.ymlby importing external files. - Multi-Stage Pipelines: Organizing your jobs into sequential stages for better workflow control.
Let’s Dive In!
1. Templates: The Power of Reusability
Imagine you have a job that runs linting for your Python code across multiple projects. Instead of copying and pasting the same configuration into each .gitlab-ci.yml file, you can create a template.
Templates are reusable configurations that you can apply to your jobs. GitLab offers a variety of built-in templates, but you can also create your own custom ones.
Example: Creating a Custom Template
Let’s create a simple template for running tests:
# .gitlab-ci.yml

.test_template:  # Note the leading dot: This makes it a hidden job, acting as a template.
  image: python:3.9
  script:
    - pip install -r requirements.txt
    - pytest
This template defines a Python image, installs dependencies, and runs pytest. Now, you can easily use this template in your pipeline:
# .gitlab-ci.yml

include: [] # We will cover this later. We need this if you plan to include external templates.

stages:
  - test

test_job:
  extends: .test_template # Inherit the template configuration
  stage: test
Key Takeaways:
- Templates start with a
.(dot) to indicate they are hidden jobs and not executed directly. - Use
extendsto inherit the configuration from a template. - Templates promote code reuse and reduce duplication.
2. Includes: Keeping Your .gitlab-ci.yml Organized
As your CI/CD pipelines grow, your .gitlab-ci.yml file can become long and difficult to manage. The include keyword allows you to break down your configuration into smaller, more manageable files.
Benefits of Using Includes:
- Modularity: Separate concerns into different files.
- Readability: Make your main
.gitlab-ci.ymlfile cleaner and easier to understand. - Reusability: Share configurations across multiple projects.
Example: Using Includes
Let’s say you want to move your test template to a separate file called test.gitlab-ci.yml:
# test.gitlab-ci.yml

.test_template:
  image: python:3.9
  script:
    - pip install -r requirements.txt
    - pytest
Now, you can include this file in your main .gitlab-ci.yml:
# .gitlab-ci.yml

include:
  - local: test.gitlab-ci.yml  # Include the local file

stages:
  - test

test_job:
  extends: .test_template
  stage: test
Different Types of Includes:
local: Include a file from the same repository.remote: Include a file from a URL.template: Include a built-in GitLab template. (e.g.,template: Jobs/Deploy/Pages.gitlab-ci.ymlfor GitLab Pages deployment)project: Include a file from another GitLab project.
Key Takeaways:
- Use
includeto modularize your.gitlab-ci.ymlfile. - Explore the different types of includes to suit your needs.
- Keep your main
.gitlab-ci.ymlfile concise and focused.
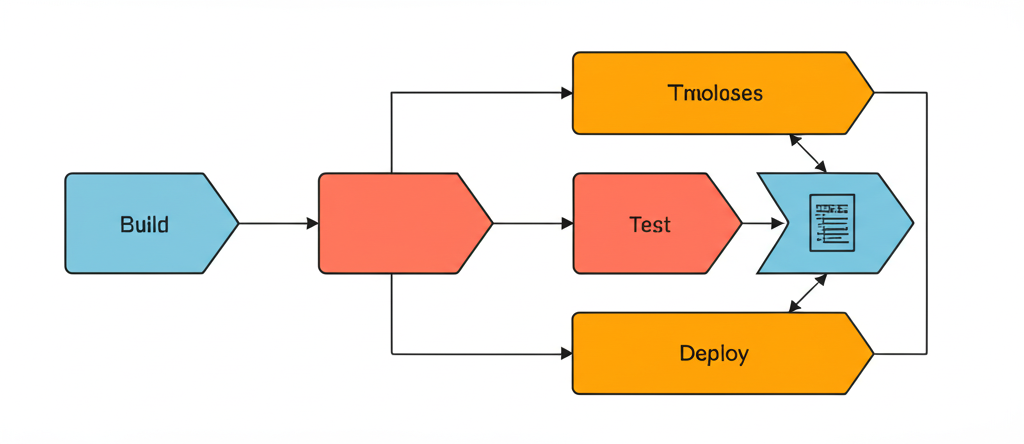
3. Multi-Stage Pipelines: Defining Your Workflow
Multi-stage pipelines allow you to organize your jobs into sequential stages. Each stage runs in a specific order, providing better control over your workflow.
Example: A Simple Multi-Stage Pipeline
Let’s create a pipeline with three stages: build, test, and deploy:
# .gitlab-ci.yml

stages:
  - build
  - test
  - deploy

build_job:
  stage: build
  image: docker:latest
  script:
    - docker build -t my-app .

test_job:
  stage: test
  image: python:3.9
  script:
    - pip install -r requirements.txt
    - pytest

deploy_job:
  stage: deploy
  image: alpine/kubectl:latest
  script:
    - kubectl apply -f deployment.yaml
  only:
    - main
Explanation:
- The
stageskeyword defines the order of the stages. - Each job is assigned to a specific stage using the
stagekeyword. - Jobs within a stage run in parallel.
- The next stage only starts after all jobs in the previous stage have completed successfully.
Benefits of Multi-Stage Pipelines:
- Clear Workflow: Visually represent your development process.
- Parallelism: Run jobs in parallel to speed up the process.
- Dependency Management: Ensure jobs are executed in the correct order.
- Conditional Execution: Use
onlyandexceptto run jobs based on branches, tags, or other conditions. (Seedeploy_jobexample above, which only runs on themainbranch.)
Key Takeaways:
- Use
stagesto define the order of your pipeline. - Assign jobs to specific stages using the
stagekeyword. - Leverage parallelism to speed up your CI/CD process.
Putting It All Together:
Now, let’s combine all three features into a more complete example. We’ll have a template for building our application, include it in our main .gitlab-ci.yml file, and use a multi-stage pipeline:
# build.gitlab-ci.yml

.build_template:
  image: docker:latest
  script:
    - docker build -t my-app .
  artifacts:
    paths:
      - ./image.tar
    expire_in: 1 hour
# .gitlab-ci.yml

include:
  - local: build.gitlab-ci.yml

stages:
  - build
  - test
  - deploy

build_job:
  extends: .build_template
  stage: build

test_job:
  stage: test
  image: python:3.9
  script:
    - pip install -r requirements.txt
    - pytest

deploy_job:
  stage: deploy
  image: alpine/kubectl:latest
  script:
    - kubectl apply -f deployment.yaml
  only:
    - main
Conclusion
By using templates, includes, and multi-stage pipelines, you can significantly improve the organization, maintainability, and efficiency of your GitLab CI/CD pipelines. Experiment with these features, and you’ll find that your CI/CD process becomes smoother, more reliable, and easier to manage. Start small, refactor often, and enjoy the benefits of a well-structured CI/CD pipeline! Happy automating!